
General functions and images
This is another joint lecture/lab! We’ll do some things in class together, and you’ll do some coding in groups.
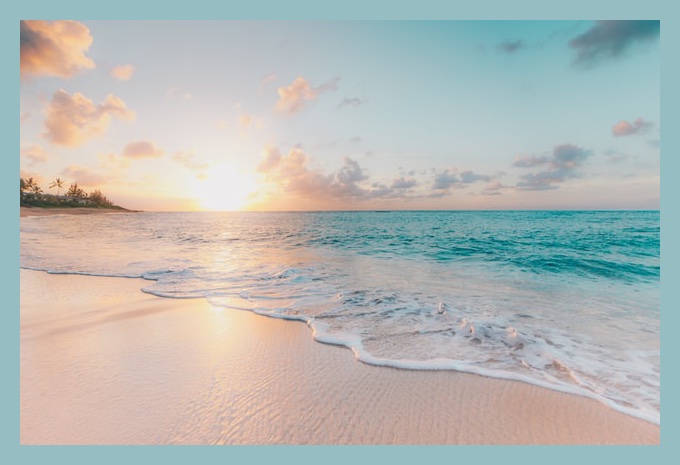
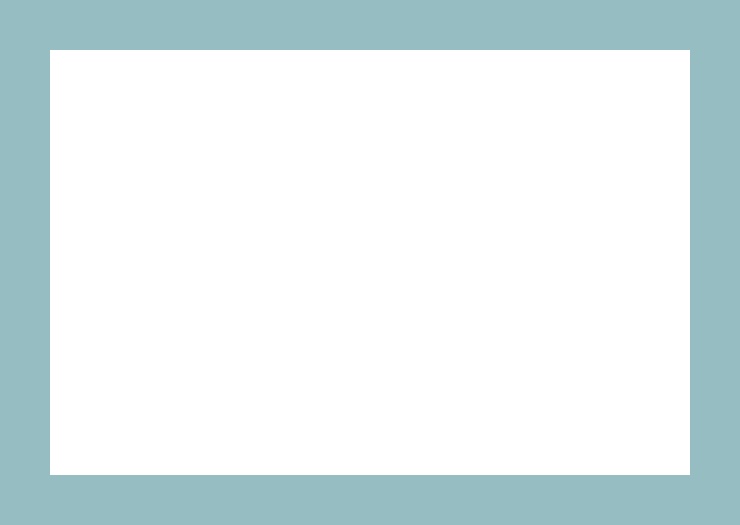
Our goal is to draw a border around an image, like this:
We’ll use this example to learn about how to write general-purpose functions.
Start by downloading a photo. Any photo is fine, but here is the moon photo
⚠️ Always download the image directly from Unsplash or Pexels. Don’t right click and save it.
Top border
Let’s start by drawing a border on the top. We might call this function:
def draw_top_border():- What parameters should this function take?
Generality
What if you want the same function to be able to draw a 20-pixel border that has the color of the sky?

But also a 50-pixel border that has the color of the sand?

Think about what you want to be able to change inside the function. For example, we might want to be able to change the height of the border and its color:
def draw_top_border(image, height, red, green, blue):Notice how we also want to be able to change the image that we apply this to.
Writing the function
Once you have the parameters figured out, you can then write the function:
def draw_top_border(image, height, red, green, blue):
    for y in range(height):
        for x in range(image.width):
            pixel = image.get_pixel(x, y)
            pixel.red = red
            pixel.green = green
            pixel.blue = blue
Notice the following:
- we use
range(height)because we want the border to be drawn in rows0...height - we use
range(image.width)because we want the border to be drawn in all columns from0...image.width - we can copy in the red, green, and blue values of the pixel from the function parameters
This function, like many we have written, loops through the rows (using y)
first, and then through the columns (using x). First, y will have the value
0, and then x will get the values 0..image.width. So for an image that is
100 pixels wide, we will first work on pixel (0,0), then (1,0), (2,0) …
(99,0), and then (0, 1), (1,1)…and so on.
You could write this function with the columns first:
def draw_top_border(image, height, red, green, blue):
    for x in range(image.width):
       for y in range(height):
            pixel = image.get_pixel(x, y)
            pixel.red = red
            pixel.green = green
            pixel.blue = blue
This would loop through the columns first (using x) and then the rows (using
y). First, x will have the value 0, and then y will get the values
0..image.height. So for an image that is 50 pixels high, we will first work on
pixel (0,0), then (0,1), (0,2) … (0,49), and then (1,0), (1,1)…
and so on.
Using the function
You can use this function to see how it works:
def image_with_top_border():
    height = 20
    red = 150
    green = 189
    blue = 194
    new_image = Image.blank(800, 600)
    draw_top_border(new_image, height, red, green, blue)
    new_image.show()


image_with_top_border()
Try changing the height and color!
Generalizing the border function
How can we take what we’ve learned and generalize this? What if you wanted a single function that could draw a bar anywhere?
def draw_bar():Defining the function
- What parameters should this function take?
- It should be able to draw a stripe, either vertical or horizontal, anywhere on an image
For example, what about these cases?
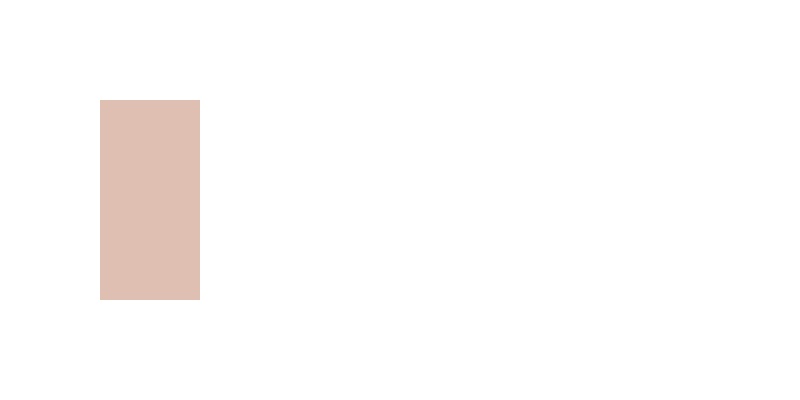
The first step is to draw out what you need:
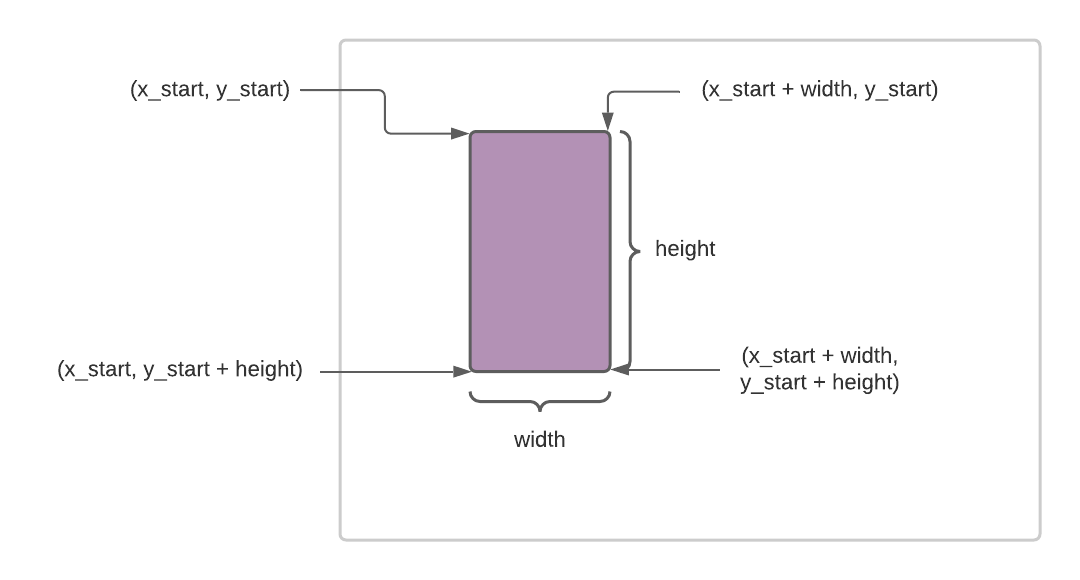
The key here is to include parameters that control the starting (X, Y) of the
bar as well as its width and height:
def draw_bar(image, x_start, y_start, width, height, red, green, blue):Writing the function
Once you have the parameters figured out, you can then write the function:
def draw_bar(image, x_start, y_start, width, height, red, green, blue):
    for y in range(height):
        for x in range(width):
            pixel = image.get_pixel(x_start + x, y_start + y)
            pixel.red = red
            pixel.green = green
            pixel.blue = blue
Notice the following:
- We use
x_startandy_startto define the starting position of the bar. - We use
widthandheightto define how big the bar is. - Inside the function, we can use
(x_start + x, y_start + y)draw a pixel for the bar, with(x, y)being controlled by the nested for loops. - This function is not that much longer than the one that just draws the border on top! This is the power of generality, your code can often be concise.
Using range()
So far, we have only used range() to count up from 0 to some maximum value. So
range(100) counts from 0 to 99. You can actually specify a starting value for
range() as well, so range(10,20) counts from 10 to 19.
This means we could rewrite draw_bar() as:
def draw_bar(image, x_start, y_start, width, height, red, green, blue):
    for y in range(y_start, y_start + height):
        for x in range(x_start, x_start + width):
            pixel = image.get_pixel(x, y)
            pixel.red = red
            pixel.green = green
            pixel.blue = blue
or, reversing the x and y loops:
def draw_bar(image, x_start, y_start, width, height, red, green, blue):
    for x in range(x_start, x_start + width):
        for y in range(y_start, y_start + height):
            pixel = image.get_pixel(x, y)
            pixel.red = red
            pixel.green = green
            pixel.blue = blue
This may be more intuitive to you. We can see from the range() functions that
we are looping over the x values from x_start to x_start + width and the
y values from y_start to y_start + height. This is precisely the area the
bar covers.
Using the function
Using this function is similar as before:
def image_with_bar():
    width = 100
    height = 200
    red = 150
    green = 189
    blue = 194
    new_image = Image.blank(800, 400)
    draw_bar(new_image, 100, 100, width, height, red, green, blue)
    new_image.show()


image_with_bar()
Try changing the height and color!
Drawing borders
Now, can you use our bar function to draw borders at the top, bottom, left, and right of an image? You want a function:
def make_borders(image, thickness, red, green, blue):That can make borders on all sides of an image, using the given thickness and
colors. This function should call `draw_bar().
Once you have written this function, you can call it like this:
def image_with_borders():
thickness = 50
red = 150
green = 189
blue = 194
new_image = Image.blank(800, 600)
make_borders(new_image, thickness, red, green, blue)
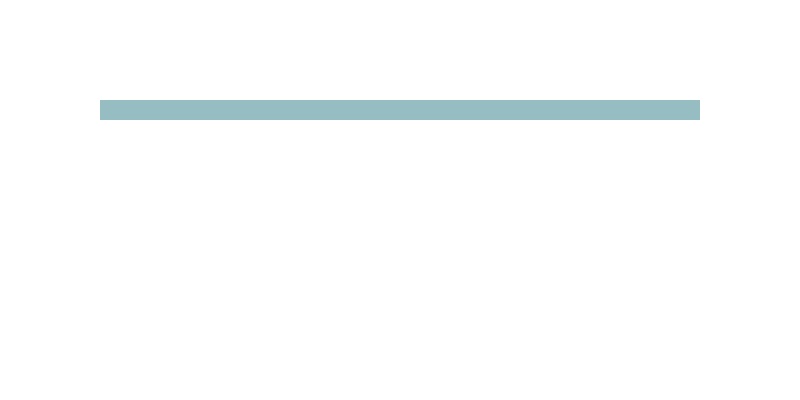
new_image.show()that can produce something like this (using a 50 pixel width):
Copying the image
The last step is to copy an image into the space that has been reserved in the middle of the borders. We want a function that is general enough to work for many situations. So you need a function like this:
def copy_image(image, image_to_copy, x_start, y_start):The image parameter is the image you are copying into (which could have
borders for example) and the image_to_copy parameter is the image you want to
copy into this one. Just like the draw_bar() function, this function uses
x_start and y_start to indicate where the copied image should be placed.
Once you write this function you can use it like this:
def photo_with_borders(filename):
    thickness = 20
    red = 150
    green = 189
    blue = 194
    photo = Image(filename)
    new_image = Image.blank(photo.width + 2*thickness, photo.height + 2*thickness)
    make_borders(new_image, thickness, red, blue, green)
    copy_image(new_image, photo, thickness, thickness)
    new_image.show()


photo_with_borders("sea.jpg")
Notice that we create a blank image with enough space to hold the borders. Then we make the borders and finally copy in the image.
You should end up with this:
Try different border sizes and colors, as well as different photos.