Loops and coordinate transformations
Today we are reviewing concepts to help you better understand some of what we’ve been doing with images.
Looping in one dimension
First, let’s look at looping in one dimension:
from byuimage import Image


image = Image.blank(100, 100)
x = 30
for y in range(image.height):
    pixel = image.get_pixel(x, y)
    pixel.red = 255
    pixel.green = 0
    pixel.blue = 0

image.show()
We create a blank image that is 100x100 pixels, set x = 30, and then loop
through just the rows of the image, using the for loop. This creates a thin red
line that starts at x=30 and covers all of the y values from 0 to the image
height.

Now let’s copy-and-paste that code, and change x so that it increments from 30
to 34:
x = 30
for y in range(image.height):
    pixel = image.get_pixel(x, y)
    pixel.red = 255
    pixel.green = 0
    pixel.blue = 0
x = 31
for y in range(image.height):
    pixel = image.get_pixel(x, y)
    pixel.red = 255
    pixel.green = 0
    pixel.blue = 0
x = 32
for y in range(image.height):
    pixel = image.get_pixel(x, y)
    pixel.red = 255
    pixel.green = 0
    pixel.blue = 0
x = 33
for y in range(image.height):
    pixel = image.get_pixel(x, y)
    pixel.red = 255
    pixel.green = 0
    pixel.blue = 0
x = 34
for y in range(image.height):
    pixel = image.get_pixel(x, y)
    pixel.red = 255
    pixel.green = 0
    pixel.blue = 0
Now we get a thicker red line that is five pixels wide, covering x = 30 ... 34
and all the y values.

Looping in two dimensions
This is why we need nested for loops! Instead of having to copy-and-paste our
code each time, we can instead have one loop to cover the x values and one to
cover the y values:
for x in range(30,34):
    for y in range(image.height):
        pixel = image.get_pixel(x, y)
        pixel.red = 255
        pixel.green = 0
        pixel.blue = 0
We will get the same thicker red line:
In this case, we will cover the pixels in this order:
- (30, 0)
- (30, 1)
- (30, 2)
- …
- (30, 99)
- (31, 0)
- (31, 1)
- (31, 2)
- …
- (34, 99)
In other words, we are going column-by-column, by fixing x, and then doing all
the y values, and then going to the next x.
It makes little difference if we loop over the y values first:
for y in range(image.height):
    for x in range(30,34):
        pixel = image.get_pixel(x, y)
        pixel.red = 255
        pixel.green = 0
        pixel.blue = 0
We will get the same image, we just cover the pixels in a different order:
- (30, 0)
- (31, 0)
- (32, 0)
- (33, 0)
- (34, 0)
- (30, 1)
- (31, 1)
- (32, 1)
- …
- (34, 99)
In other words, we are going row-by-row, by fixing y, and then doing all the
x values, and then going to the next y.
Writing functions
Anything we have done so far we can put into a function:
from byuimage import Image


def draw_bar(image):
    for x in range(30, 34):
        for y in range(image.height):
            pixel = image.get_pixel(x, y)
            pixel.red = 255
            pixel.green = 0
            pixel.blue = 0


my_image = Image.blank(100, 100)
draw_bar(my_image)
my_image.show()
We will get the exact same result:
A very impressive demo so far!
Generalizing
You can control the height of the bar as well:
def draw_bar(image):
    for x in range(30, 34):
        for y in range(20, 80):
            pixel = image.get_pixel(x, y)
            pixel.red = 255
            pixel.green = 0
            pixel.blue = 0
This gets us a shorter line:
Now, take each of those hard-coded values in the for loops and turn them into parameters for the function:
from byuimage import Image


def draw_bar(image, x_start, x_end, y_start, y_end):
    for x in range(x_start, x_end):
        for y in range(y_start, y_end):
            pixel = image.get_pixel(x, y)
            pixel.red = 255
            pixel.green = 0
            pixel.blue = 0


my_image = Image.blank(100, 100)
draw_bar(my_image, 30, 60, 40, 70)
my_image.show()
Notice that we created four parameters, x_start, x_end, y_start, and
y_end, one for each of the starting and stopping points used in the range()
function.
Now we can draw a bar of whatever shape we want, wherever we want in the image!
It is not a big stretch from here to pass in the colors as well:
def draw_bar(image, x_start, x_end, y_start, y_end, red, green, blue):
    for x in range(x_start, x_end):
        for y in range(y_start, y_end):
            pixel = image.get_pixel(x, y)
            pixel.red = red
            pixel.green = green
            pixel.blue = blue

my_image = Image.blank(100, 100)
draw_bar(my_image, 30, 60, 40, 70, 150, 20, 100)
my_image.show()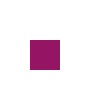
Coordinate transformations
You might prefer to pass in the width and height of the bar instead of having to use coordinates to indicate where the bar stops. You could easily do this by changing the parameters of the function:
def draw_bar(image, x_start, y_start, width, height, red, green, blue):Doing this requires understanding coordinate transformations.
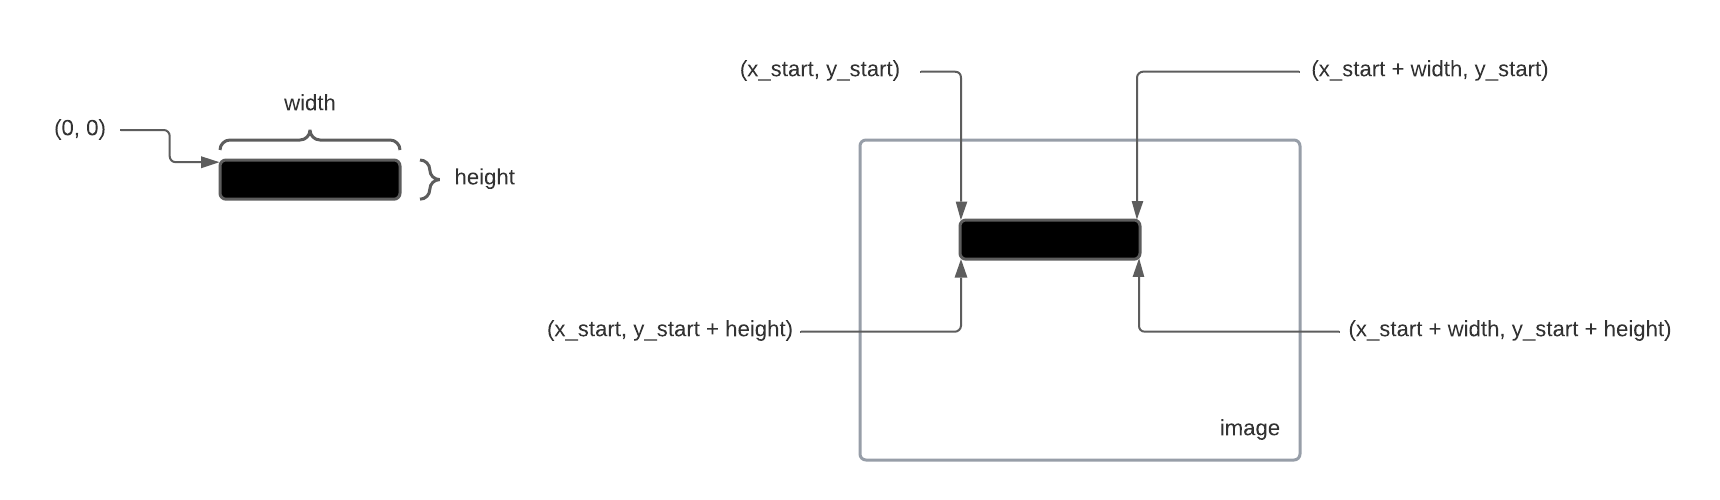
We can look at the bar separately, and think of it as starting at a coordinate
of (0, 0) in the top left corner, with a width and height. That means we can
loop over all of its pixels with:
for x in range(width):
    for y in range(height):
But now when we want to get the pixel to draw on the image, we need to transform the coordinates if the bar into the coordinates of the image:
for x in range(width):
    for y in range(height):
        pixel = image.get_pixel(x_start + x, y_start + y)
So our complete drawing function would be:
def draw_bar(image, x_start, y_start, width, height, red, green, blue):
    for y in range(height):
        for x in range(width):
            pixel = image.get_pixel(x_start + x, y_start + y)
            pixel.red = red
            pixel.green = green
            pixel.blue = blue
Alternatively, we can start with the nested for loops looping over pixels in the image directly:
for x in range(x_start, x_start + width):
        for y in range(y_start, y_start + height):
            pixel = image.get_pixel(x, y)
This allows us to use (x, y) when getting the pixel.
def draw_bar(image, x_start, y_start, width, height, red, green, blue):
    for x in range(x_start, x_start + width):
        for y in range(y_start, y_start + height):
            pixel = image.get_pixel(x, y)
            pixel.red = red
            pixel.green = green
            pixel.blue = blue


my_image = Image.blank(100, 100)
draw_bar(my_image, 30, 30, 30, 10, 150, 100, 20)
my_image.show()
Either way, we should be able to get the same bar drawn:
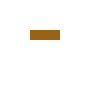
We’ve minted a gold bar!
Making borders
Now that we have a function that can draw bars at an arbitrary location, we can use it to draw all the borders of an image:
def make_borders(image, thickness, red, green, blue):
    # draw top bar
    draw_bar(image, 0, 0, image.width, thickness, red, green, blue)
    # draw bottom bar
    draw_bar(image, 0, image.height - thickness, image.width, thickness, red, green, blue)
    # draw left bar
    draw_bar(image, 0, 0, thickness, image.height, red, green, blue)
    # draw right bar
    draw_bar(image, image.width - thickness, 0, thickness, image.height, red, green, blue)


first_image = Image.blank(100, 100)
make_borders(first_image, 30, 255, 0, 0)
second_image = Image.blank(800, 300)
make_borders(second_image, 10, 150, 20, 100)
first_image.show()
second_image.show()
Run this code and see what you get!
Copying images
We use the same concept of coordinate transformation when copying an image.
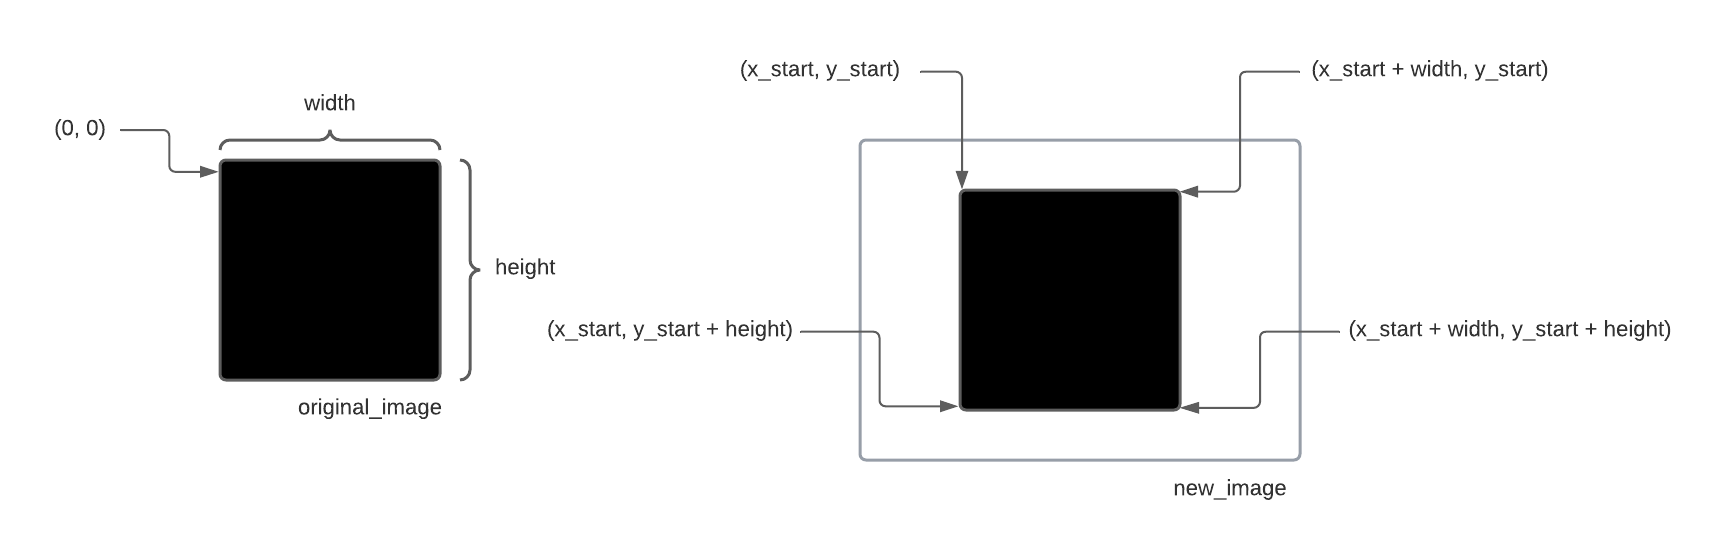
Once you write a function to do this:
def copy_image(new_image, original_image, x_start, y_start):then you can use draw_bar() and copy_image() to make all kinds of new
images: